How to Install a CB Radio in a Semi: A Step-by-Step Guide
Installing a CB radio in a semi is straightforward. Start with the right tools and a good plan.
Truck drivers use CB radios to stay in touch. They help with road updates, emergencies, and finding help. This guide will show you each step to install your CB radio. It’s easy and makes your trips smoother. Follow along to get your CB radio working in no time.
Choosing The Right CB Radio
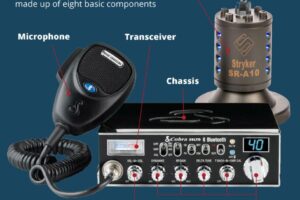
Installing a CB radio in your semi is a smart move. It helps with communication on the road. But first, you need the right CB radio. Let’s look at some popular models and key features to consider.
Popular Models
There are many CB radios available. Some top choices include the Cobra 29 LX, Uniden Bearcat 980, and Galaxy DX 959. Each of these models has its own strengths.
The Cobra 29 LX is known for its reliability. The Uniden Bearcat 980 offers advanced features like weather alerts. The Galaxy DX 959 is praised for its power and range.
Key Features To Look For
When choosing a CB radio, consider its key features. Look for a model with a clear display. A large, easy-to-read screen helps you stay focused on the road.
Check the radio’s power output. Most CB radios offer the maximum 4 watts allowed by law. This ensures good range and clear communication.
Noise reduction is also important. Features like automatic noise limiter (ANL) and squelch control can make a big difference. They help to reduce background noise and improve sound quality.
Finally, consider the radio’s size and ease of installation. Choose a model that fits well in your semi’s cab and is easy to install.
Gathering Necessary Tools
Installing a CB radio in your semi can be an exciting project. But before you dive in, gathering the right tools is essential. A well-prepared toolkit ensures a smooth installation process and minimizes frustration. Let’s break down the tools you’ll need to get started.
Essential Tools List
First, you’ll need some basic tools that are absolutely necessary for this installation. Here’s a quick list:
- Screwdrivers: Both Phillips and flathead screwdrivers are a must. You might need different sizes, so it’s good to have a set.
- Wire Cutters/Strippers: These will help you manage the electrical wiring. Clean cuts and proper stripping are crucial.
- Multimeter: This tool is essential for checking voltages and ensuring connections are secure. It helps prevent electrical issues.
- Drill and Drill Bits: A cordless drill will make installation quicker. Make sure you have the right size bits for your screws and mounting hardware.
- Wrench Set: You’ll need these to secure the radio and antenna mounts. A set with various sizes will be handy.
Optional Tools
While the essential tools will get the job done, some optional tools can make your life easier:
- Heat Shrink Tubing: This can be used to insulate and protect your wire connections. It’s a good practice to keep your wiring neat and secure.
- Soldering Iron: If you prefer soldered connections, a soldering iron is invaluable. It ensures a strong, reliable bond.
- Magnetic Pickup Tool: Dropping screws and bolts in hard-to-reach places happens. A magnetic pickup tool can save you from a lot of frustration.
- Zip Ties: Keeping your wires organized can be challenging. Zip ties help manage your wiring and prevent tangles.
- Flashlight: Working in dimly lit areas of your truck can be tough. A good flashlight can make a huge difference.
Having the right tools at your disposal can make the installation process much smoother. Have you ever started a project and realized halfway through that you were missing a crucial tool? It can be frustrating and time-consuming.
So, before you start, double-check your toolkit. Make sure you have everything you need. This simple step can save you a lot of headaches down the road. Ready to get started?
Preparing The Installation Area
Installing a CB radio in your semi-truck can enhance communication on the road, making your journeys safer and more efficient. Before you dive into the actual installation, it’s crucial to prepare the installation area properly. This step ensures that your CB radio functions optimally and lasts longer. Let’s break down the preparation process into two key tasks: finding the best location and cleaning and organizing.
Finding The Best Location
Choosing the right spot for your CB radio is essential. You want it to be easily accessible yet secure. Consider areas like the dashboard or a dedicated spot on the console.
Think about visibility. Can you see the radio clearly without straining your eyes or taking your focus off the road? You might recall a time when you struggled to adjust your radio because it was poorly placed. Avoid that hassle by selecting a spot within arm’s reach.
Evaluate the space. Is there enough room for the radio and associated wiring? You don’t want a cramped installation area. Also, ensure there’s no interference with other controls or devices.
Have you thought about how the placement will affect your driving comfort? Positioning it too close might get in the way, while placing it far off might be inconvenient. Aim for a balance between accessibility and unobtrusiveness.
Cleaning And Organizing
Before you start mounting your CB radio, clean the area thoroughly. Dust and grime can affect the radio’s performance and longevity. Use a cloth and cleaner to wipe down the chosen spot.
Organize your tools and materials. Lay them out neatly so you can easily find what you need. This prevents unnecessary delays and keeps the installation process smooth.
Have you ever tried fixing something only to realize you misplaced a tool? Avoid that frustration by keeping everything within reach and organized. It’s a small step that makes a big difference.
Consider the wiring. Plan where each wire will go and ensure they don’t cross other cables or obstruct any vehicle functions. Neat wiring prevents tangling and makes future maintenance easier.
Preparing the installation area isn’t just a preliminary task; it’s the foundation for a hassle-free CB radio setup. By finding the best location and ensuring a clean, organized workspace, you’re setting yourself up for success. What challenges have you faced in previous installations, and how did you overcome them?
Mounting The Cb Radio
Install a CB radio in your semi by first choosing an ideal location. Secure the radio using brackets and screws. Finally, connect the power and antenna cables for proper operation.
### Mounting the CB Radio
Mounting the CB radio in your semi is a critical step. Ensuring it’s secure and accessible can make a world of difference. Here’s how you can do it right.
Mounting Brackets
First, you need to select the right spot for your CB radio. The mounting bracket is your best friend here. Choose a location that’s within easy reach but doesn’t obstruct your driving.
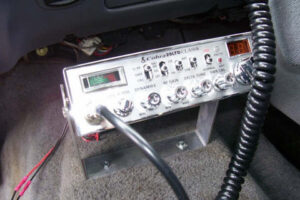
I found that mounting it just below the dashboard works well. It keeps the radio accessible without interfering with other controls. Use the screws provided with your CB radio to attach the bracket securely.
Securing The Unit
Once the bracket is in place, securing the unit is straightforward. Slide the CB radio into the mounted bracket. Ensure it clicks into place.
A snug fit is essential. You don’t want the radio moving around while you’re on the road. Tighten any additional screws if your model requires it.
Consider using a bit of Velcro for extra security. It’s a simple trick that can prevent rattling, especially on bumpy roads.
Have you ever had your CB radio fall off while driving? It’s not fun. By securing it properly, you can avoid such mishaps and focus on communicating effectively.
Now that the unit is mounted and secured, you’re ready to connect it. But remember, a well-mounted CB radio is the first step to a reliable communication setup in your semi.
Connecting The Power Supply
Connecting the power supply is a crucial step in installing a CB radio in a semi-truck. It ensures the radio has a stable power source and operates smoothly. This section will guide you through the basics of wiring and help you avoid common mistakes.
Wiring Basics
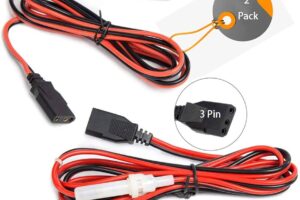
First, locate the truck’s battery. This is where you will connect the power wires. The red wire connects to the positive terminal. The black wire connects to the negative terminal. Use a fuse holder on the red wire. This protects the CB radio from power surges. Secure the wires with cable ties. This keeps them neat and prevents damage.
Avoiding Common Mistakes
Do not connect the power wires without a fuse. This can damage the CB radio. Ensure the wires are not pinched or frayed. Damaged wires can cause shorts or fires. Double-check all connections. Loose connections can lead to poor performance. Use the correct gauge wire. Too thin wires can overheat. Read the CB radio’s manual for specific instructions. Each model may have unique requirements.
Installing The Antenna
Installing the antenna for your CB radio is a crucial step. A well-installed antenna ensures clear communication and optimal performance. Let’s break down the process to make it easy and efficient for you.
Choosing The Right Antenna
First things first, you need to choose the right antenna. There are various types available, including fiberglass, magnetic mount, and whip antennas. Each has its own set of advantages and fits different needs.
Consider the range you need. A longer antenna generally provides better range but may be more cumbersome. If you frequently drive through areas with low clearance, a shorter, more flexible antenna might be a better choice. Reflect on your driving conditions to make the best decision.
Antenna Placement
Where you place your antenna matters a lot. The higher and more centrally located, the better your signal will be. Many truckers prefer mounting it on the rearview mirror brackets or the back of the cab.
Ensure the antenna is clear of obstructions. Metal objects can interfere with the signal, so avoid placing it near other large metal parts. Also, consider grounding; a well-grounded antenna reduces interference and improves signal quality.
Have you ever noticed how clear your radio sounds on an open highway compared to a city with tall buildings? That’s the effect of placement and obstructions. Keep this in mind as you choose your spot.
By selecting the right antenna and placing it correctly, you’ll set a solid foundation for your CB radio setup. This will make your communication clearer and more reliable. Ready to move on to the next step?
Testing And Tuning
Testing and tuning your CB radio in a semi is crucial for optimal performance. This process ensures that your device is working correctly and can communicate effectively with other units. Let’s break down the steps involved in testing and tuning your CB radio.
Initial Power On
Start by powering on your CB radio. Ensure all connections are secure and the antenna is properly installed. When you switch on the radio, check if it lights up and produces sound. If there are any issues, double-check the wiring and connections.
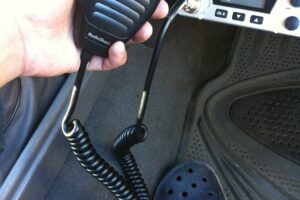
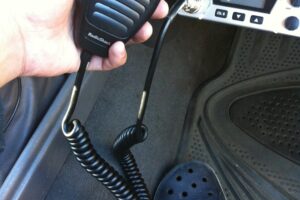
At this stage, you should also test the microphone. Speak into it and listen for feedback. It should be clear and crisp. If there’s any distortion, you may need to adjust the connections or replace the microphone.
Adjusting Settings
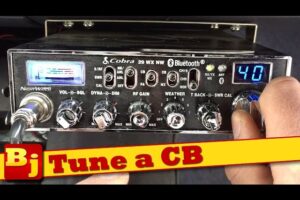
Once your CB radio is powered on, it’s time to adjust the settings. Begin with the squelch control. This helps eliminate background noise. Turn the squelch knob until the static disappears, but be careful not to set it too high, as it may block weak signals.
Next, adjust the RF gain. This control affects how well your radio receives signals. Set it to maximum for the best reception. If you are in a crowded area, you might need to reduce it slightly to filter out unnecessary noise.
Don’t forget the channel selection. Choose an active channel to test communication. You can ask for a radio check from other drivers or simply listen for ongoing conversations to ensure your radio is receiving signals correctly.
Have you ever wondered if your CB radio is reaching its full potential? Testing and tuning might be the missing link. Share your experiences and insights below!

Credit: www.youtube.com
Troubleshooting Tips
Installing a CB radio in a semi can be tricky. Even with a good installation, issues can arise. Troubleshooting tips can help you solve common problems and keep your radio in top shape. This section offers solutions to frequent issues and advice on maintaining your CB radio for optimal performance.
Common Issues
Static or unclear transmissions can be a common problem. Check your antenna connections. Ensure they are tight and free from corrosion. If the problem persists, consider upgrading to a higher quality antenna.
Another issue is interference from other electronic devices. Turn off nearby electronics one by one. Identify the source of interference and move the device or the CB radio to reduce the issue.
If your CB radio does not power on, check the power connections. Confirm that the radio is securely connected to the power source. Inspect the fuse and replace it if necessary.
Maintenance Advice
Regular maintenance can prevent many common issues. Clean your CB radio and antenna regularly. Dust and dirt can affect performance.
Check the cables and connections for wear and tear. Replace any damaged components promptly. This can prevent small problems from becoming bigger issues.
Test your CB radio periodically. Ensure it is working correctly and transmitting clearly. Regular testing can help you catch problems early.
Store your CB radio in a dry place when not in use. Moisture can damage the internal components.
Final Thoughts
Installing a CB radio in your semi is not just about following steps and plugging in wires. It’s about enhancing your communication on the road and ensuring you get the most out of your investment. As you wrap up the installation process, there are a few final thoughts to keep in mind to make sure your CB radio serves you well for years to come.
Ensuring Longevity
Your CB radio is an essential tool for your travels, so you want it to last. Keep the connections tight and check them regularly. Loose connections can lead to poor performance and potential damage.
Consider weatherproofing your setup, especially if you frequently drive in areas with harsh weather conditions. Moisture and dust can be detrimental to your radio’s lifespan.
Regularly clean and inspect your antenna. A well-maintained antenna ensures clear communication and extends the life of your CB radio. You don’t want to be stuck with a malfunctioning radio when you need it the most.
Enhancing Communication
Now that your CB radio is installed, it’s time to think about how to make the most of it. Practice makes perfect. Spend some time getting familiar with the controls and features. This will help you communicate more efficiently while driving.
Build a habit of scanning channels. This keeps you updated with the latest road conditions and any important information from fellow drivers. It’s a small step that can make a big difference in your journeys.
Engage with other drivers and share information. CB radios are not just for emergencies. They are a great way to stay connected with the trucking community. Have you ever thought about how much you can learn from others’ experiences on the road?
Take these final thoughts to heart and you’ll find that your CB radio is more than just a piece of equipment. It’s a companion that makes your travels safer and more enjoyable. Happy driving!

Credit: www.rightchannelradios.com
Credit: www.reddit.com
Frequently Asked Questions
Are Cb Radios Hard To Install?
CB radios are generally easy to install. Most come with user-friendly instructions. Basic tools and some patience are needed.
How Do You Hook Up A Cb In A Truck?
Mount the CB radio securely. Connect the power cable to the truck’s battery. Attach the antenna and tune it for optimal performance. Connect the microphone. Test the setup by turning on the CB radio and ensuring clear communication.
How Do You Power A Cb Radio In A Truck?
Connect the CB radio to the truck’s battery using proper wiring and a fuse. Ensure the radio’s power switch is on.
What Is Needed To Install A Cb Radio?
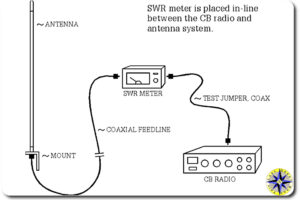
To install a CB radio, you need a CB radio unit, an antenna, a microphone, power source, and coaxial cable. Ensure proper mounting and grounding.
Conclusion
Installing a CB radio in your semi is simpler than you think. Follow the steps carefully. Check all connections. Test the radio. Ensure clear communication. Adjust settings for optimal performance. Enjoy safer and smoother drives. Stay connected with fellow drivers.
Troubleshoot any issues promptly. Keep your radio in good condition. Regular maintenance is crucial. Remember, effective communication keeps roads safer. Happy driving!

